How to Setup Android Development Environment - Part 1

Related Examples

Goal: Step by step instructions to install and configure your Android development environment for Windows.

Environment/tools: Here is the setup I have chosen to use.

  • Windows (I'm using Windows 7, but any flavor of windows will do)
  • Eclipse IDE for Java Developers (v3.5 Galileo)
  • Java Platform (JDK 6 Update 18)
  • Android SDK Tools, Revision 4

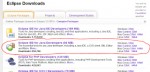
 Step 1. Install Eclipse IDE
I chose to use the Eclipse IDE for Java Developers (v3.5 Galileo). You can download the it here


  • This is a zip file and does not require installation. Just copy the eclipse folder into your programs directory

Step 2:  Install Java Platform (JDK 6 Update 18)


  • Select your platform

  • Now run the JDK installation. I did not change any of the default installation options. When complete continue to step 3.


Step 3: Download the Android SDK Tools, Revision 4


  • This does not require installation. Just unzip and copy the files. You can install the package anywhere but remember where you put as you will need to reference it in Eclipse. I happen to install it inside my eclipse folder.

Step 4:  Configure Android SDK


  • Launch "SDK-Setup.exe" located in the Android SDK install folder"
  • If you receive the following "Failed to fetch url https://dl-ssl.google.com/android/repository/repository.xml" we need to change the URL to not use SSL. Close the error dialog.
  • Press "Cancel" on the "Choose Packages to Install" Dialog
  • Select "Settings" in the left pane
  • Check "Force https://... sources to be fetched using http://"
  • Press "Save and Apply"
  • Select "Available Packages" in the left pane
  • Select "Documentation" (at the top of the list)
  • Select "Usb Driver Package, rev 3 (at the bottom of the list)
  • And then select any platform you want to develop. You can select all (be prepared for a long download) or you can select only the platfrom for you phone. The Nexus One uses 2.1 and the Droid for Verizon uses 2.0.1.
  • Check "Accept All" and Press "Install Accepted"

  • When done press "Close"
  • Now we are going to create a virtual device (AVD)
  • Select "Virtual Devices" in the left pane
  • Select "New..."
  •  Create the following new Android Virtual Device
    • Name: Android2.1
    • Target: Android 2.1 API Level 7 (Or which ever API you installed)
    • SD card Size: 4000 MiB to 32000MiB (16000 MiB shown)
    • Leave the rest at the default settings

  • Press "Create AVD". Be patient it may take a few minutes to create your new AVD.
  • Close the SDK setup. 

Step 5:  Configure Eclipse
(These instructions are for Galileo version of Eclipse. Please see this page for instructions if you downloaded the Ganymede version of Eclipse)


  • Launch Eclipse for the first time. You will be asked where you want to your workspace folder to be located.
    • I used the default location. 
    • Check "Use this as the default and do not ask again" so you don't have to answer this question every time.
    • Press "OK".
 
  • Select "Help > Install New Software..."
  •  Press "Add..."
  • Fill out the Add Site information
    • Name: Android
    • Location: https://dl-ssl.google.com/android/eclipse/
    • Press "OK"

 If you get an error don't use SSL. change location from "https://dl-ssl.google.com/android/eclipse/" to "http://dl-ssl.google.com/android/eclipse/"

  •  After a connection is made and available tools are retrieved expand "Developer Tools" and select "Android DDMS" and "Android Development Tools"
  • Press "Next"
  • Press "Next" again.
  • Check "I accept the terms of the license agreements"
  • You may receive a Security Warning about unsigned content. Press "OK"
  • Done. Now you should restart Eclipse.
  • After rebooting we need to tell Eclipse where we copied the "Android SDK" in step 3.
  • Select "Windows > Preferences"
  • Select "Android" from the left pane. After you select "Android" you will receive an error. That is because it is not setup yet. We are setting it up now.
  • For the SDK Location, browse to where you installed the SDK.
  • Press "OK"
  • A dialog box will appear. If you want to send usage data to Google leave it checked, other uncheck it and press "Continue". This dialog box can sometimes get trapped beneath your window. Minimize Eclipse if you don't see it.